|
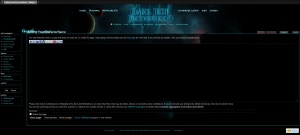
Under Construction This page seems to be Under Construction. Watch out for large groups of Rebel fighters.
After construction is complete, please remove this message.
|
This is a complete beginner's guide for getting started with the wiki, including account creation, character page creation, and image uploading. Hopefully this will help more members, young and old, get involved in adding to the Dark Brotherhood's greatest compendium of knowledge.
Introduction
The Dark Brotherhood Wiki serves as a repository for all the information members of the Brotherhood have created or collected over the years. This includes everything from the details of specific events to the personal histories of member characters and everything in between. If you're ever stuck in the Brotherhood and need to learn more about something, the Wiki is the best place to start.
Every member of the Brotherhood has the ability to access the wiki and edit it. Most new members first experience with the wiki is the creation of their own, personal Character Pages. These pages will hold all the relevant fictional information about your character including your history, personality, character description, etc. The purpose of these pages, aside from archiving the information, is to provide extra details about your character so both you and other people can write it more effectively in fiction.
 The Wiki editing window. Click to enlarge!
Character Page Creation
Now we reach the true purpose of this course and the wiki itself, that is, becoming a contributing member. The first thing any new member should do is create their own personal character page. We have a number of tools in place to help you create a page of quality that matches the best articles on the site. The real job is coming up with a fictional history and description for yourself that will help yourself and others understand your character better.
Though there are some boundaries to what you can add, for the most part you are free to create the type of character that suits you best—whether that be a warrior, a scholar, a pilot, a spy, solider, bounty hunter, etc… whatever makes you happy. As for the rules, the main thing you need to familiarize yourself with is the timeline the Dark Brotherhood takes place in. Currently, the Star Wars year the Brotherhood operates in is 43 ABY, which means you can't be a character from the TOR era because few (if any) species can live thousands of years. The next big barrier, and one most people have problems with, is your characters limitations.
 The Getting Started page. Click to enlarge!
Everyone wants to be the best, the strongest they can possibly be, but characters strength in the Brotherhood is directly tied to your rank. Think of it as an RPG where you gain levels (ranks) to increase your access to abilities and weapons. A big part of this is given to you in the form of the Character Sheet on your dossier. (See link). This will help define your abilities. Your personality, quirks, enemies, etc. is all up to you.
- Login to the DJB Wiki with your account name and password
- The easiest way to create a new page is to type the desired page name into the search box and click "Go". For your character page, make sure to use your full DB name.
- This will bring up a list of search results that are in any way directed to your search term. However, if the actual pagename does not exist at the top it will say, "Create the page "PAGENAME" on this wiki!"
- Click the red link to open up the page editor
- Now comes the interesting part, starting your page. You can find the basics for starting a new character page on the wiki guide found here: Getting Started
- Simply copy the text in the dotted box starting with {{Eras.. and ending with the final }}. Paste all this into the wiki page editor
- With a few basic lines, you can press the Show Preview button at the bottom (use this often!) to see what you have wrought. With nothing but the copy/paste job you'll see some small images at the top and an empty infobox with just headings. It's your job to start filling out the info with your character's data.
- To begin the real part of your wiki (the part with actual writing) go back to the Getting Started link and copy the next section starting with "Summary of your... and ending with your unit category. Paste that all into the editor underneath the previously pasted stuff.
- Preview again and you can see your infobox and some headings. Your wiki is starting to shape up.
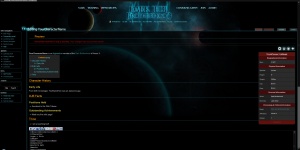 A preview of how your template looks. Click to enlarge!
- Now the fun part, start filling out the details! Begin with your summary. It should simply describe who your character is, their rank, and House or Clan affiliation.
- Example: Solari is a Shard Battlelord of Clan Odan-Urr. He is an expert slicer and archivist whose time inside droid hosts has adapted his thought processes to be on the same levels as an advanced computer and prefers the company of electronic beings; whom he can communicate with naturally without the need of a translator.
- After that, start working on your history. Utilizing the info provided in the Getting Started guide you can easily add your own subheadings and make your page uniquely yours. It's definitely a good idea to get input from your fellow DB members about content to give you an idea of where to start from. The rest is up to you.
- Example: Rather than any specific example, I would suggest taking a look at the pages of other members of your Clan or House to get a general idea of what to do. You can find a list of all character pages in Category:Characters
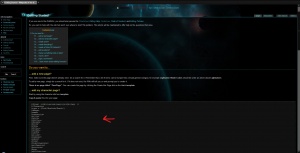
Uploading Images
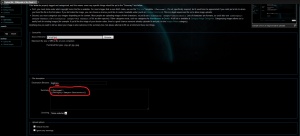 Upload file page. Click to enlarge!
- To begin uploading, find the "Upload file" link on the menu bar -- Special:Upload
- Images uploaded to the wiki must come from your hard drive, so if you find one you like online, first save it to your desktop then Browse to where the image is located to upload.
- Change the name of your image to something more personal.
- Example: yournamefightingjedi.jpg (keep the file extension the same as the actual file or you'll encounter errors)
- Now, you've selected an image and named it only a few more minor additions before hitting the upload button. All images on the wiki are either Fairuse or Creative Commons. Simply add {{Fairuse}} or {{CreativeCommons}} to the edit field and it will properly add the template.
- The last thing a new image needs is categorization. Categories help filter and separate the thousands of images the wiki stores to make finding certain ones simpler. Choose the most fitting (and you can have more than one) from the list found here - Category:Image Categories. The syntax for Category links is simple: [[Category:categoryname]]
- Example: [[Category:Images-Characters]] using this sorts all character-related images (member and NPC) into that category.
- Now you are ready to hit the upload button and the wiki will create a new page for that image.
- Now to add it to your own page. Simply begin editing your page and add the image with the following format: [[Filename.ext|*px|thumb|orientation|Description]]
- Break down: Filename is obviously the name of the file you just uploaded.
- The # indicates the size in pixels you want the image to be displayed. The wiki is pretty good at this so you can enlarge small images and vice versa relatively easily. Standard size ranges from 100-250px for normal images.
- Thumb denotes the fact the image is a thumbnail. These should be used in every image but one inside an infobox or other table.
- Orientation is a simple choice of whether you want the image on the left side of the page or the right side. Text wraps around either, so it is mainly a cosmetic choice.
- The description is easy enough—a one sentence description of what the image depicts.
- Use the Show Preview button to help you find the right spot and size for your image. It'll save needless amount of minor saves.
- Once your satisfied with your image, save the page! And there you have it, a complete and beautiful wiki page. Now others may learn more about your character and you can continue to develop your fictional history and skills as you grow in the Brotherhood.
Further Reading
What this guide is meant for is to get you started with the Brotherhood Wiki and help you complete your Character Page enough that it can be utilized in things like fiction and ACC events. To really develop your Wiki skills and enhance your own and other pages further, make sure to check out the informational guides located at:
These pages will help you fine-tune things and learn specific wiki syntax required to do things like linking to other pages, linking to Wookieepedia, and properly formatting your text. If you ever need further assistance, on the Main Page you can find a list of Wiki Staff members who are available through email, IRC, or their User:Talk pages.