Template:Featured
CTF Primer
A Taldryan Guide to the Art of CTF
This document is an instructional guide for members just starting to play Capture-the-Flag for the game Jedi Outcast. It will contain techniques for flag running, defending and supporting, as well as several possible CTF Force Configurations that can be used for whichever position you find yourself playing.
Now, before we get started, I’d like to point out that not everyone will be amazing at CTF. Reading this primer is a good start, but nothing can take the place of hands-on practice. Get as much of it as you can. Use the different Gaming Nights to play and earn CFs or play each other for fun and to test your skills so as to perfect them for larger competitions. Don’t give up if you’re not one of the best playing, everybody starts as a beginner. With that said, remember that CTF is about having fun with your friends. Let’s begin…
Positions
Runner
A runner is the person or persons on a team that focus all their efforts on capturing the enemies flag and scoring a point for their team. Speed and agility are key to being a good runner, as well as knowing the map you’re playing inside and out and the ability to use the different jump techniques to your advantage.
On spawning the runner usually makes his way towards the enemy base using Force speed/jump and grabbing weapons along the way as opposed to loading up to fight a lot of battles. Capping is their only objective and because of this runners tend to die the most out of any other position.
Position Overview
Jumps
There are several different special “jumps” that can be used on the Bespin map to help the runner reach the enemies flag or his own faster, but be warned: These jumps leave the runner open to counter-attacks by enemy pull/push whores. There is a way to counteract this somewhat, but it is tricky and is not foolproof. First, we will discuss the jumps themselves. Note: All directions (left, right, etc) are based on the runners point of view when running towards a base.
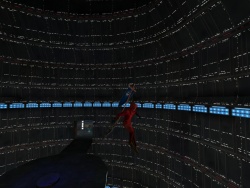 Right Window Jump
Left Hall to Platform Jump – Though it seems like a tricky jump, it is actually one of the easiest to succeed at. When force speeding (yes, you need to be using speed) down the left hallway you come to an opening that gives you full view of the flag platform. Strafe towards the edge and give your jump button a bit of a tap. Not too much so that you hit the ceiling, just enough to launch yourself over the gap and onto the platform. From there you have the option of running through the door, or – you can make the return jump to the left hallway, or even attempt the jump to the window on the far right of the flag chamber.
Return to the Left Hall Jump – This jump is a bit trickier as the sloped ceiling can cause you to plummet to your death. Not a desired outcome now that you have the flag. If you still have force speed activated and enough force left to jump, strafe toward the left edge of the platform aiming for the left hall. You need to lightly jump while continuing to strafe towards the left hall to make this jump. A lot of times it helps to have your finger on the crouch button as well, just to make sure. The amount of force used for these two jumps is relatively low (after the initial use of speed) and it’s always a good idea for a runner to conserve force when they can.
Right Window Jump – The final platform-related jump is the jump from the platform to the window located on the right side. This is helpful because you gain a huge lead over your pursuers, but like the other jumps this one leaves you wide open to push/pull attacks. If you feel the platform is free of enemies always try to make this jump – it’s very helpful and rather simple to do. With force speed on, run towards the window and jump until you’re just a bit above it. Keep pressing forward as you slide downwards and hit the crouch button and you’ll duck inside the window. With more practice you’ll be able to hit the window directly and crouch into it, but to start it’s always easier to slide down… it just leaves you vulnerable for a moment longer.
Defending Your Flag
As a runner you’ll often have grabbed the flag at the same time as the enemies runners have grabbed yours. These stalemates are often decided on how skilled the runner is at surviving. Knowing how to keep yourself fully healed, with plenty of ammo is important. The use of force seeing will give you some warning of where would-be attackers are coming from. Your best bet is to either use the flechette or the repeater and finish your enemy off as quickly as possible and then retreating to your bases shield/bacta room.
There isn’t much to say about this as your skill with guns and knowledge of when items spawn pretty much decides how long you can survive. If you have enough teammates, some will obviously stay back to guard you while the rest target the enemy flag carrier. Sometimes stalemates last a long time, don’t get bored and try something risky. It’ll cost you the flag and possibly the game.
Strategy
I'm very, very sneaky
On spawning, hit Force Speed and run from your base (try to hit any ammo/weapon/shield items) and enter the enemy base on the right side. Once you're at those column-like things, stop your speed and walk the rest of the way. Grab the three shields behind the one column and wait til you're force is up a bit. Then, hit speed, run over the Flechette (especially if you don't have one yet), switch to it and lay down a barrage at the waiting defense. With them out of the picture, run into the base, grab the flag and choose one of the two jumps to make your escape.
This method works best if you have a fellow runner moving in from the left side, or if you have a bunny waiting in the middle to energize/protect your ass. Watch out for craptacular respawns. Sometimes the defender you killed will spawn right next to your "Return to Left Hall" jump and push your ass down. If you have enough force, try to make the jump to the window and take the top bridge back to your base.
Ugh, you bastard!
When dealing with competant defenders (ie: Defenders who spam the hell out of push/pull), it's usally a better idea to run into the back hall and take them on man to man before attempting a grab at the flag. With these defenders around it's nearly impossible to pull off a platform jump.
Eat Push, Defender
This works well with moderate to advanced defenders, depending on their skill and yours. Run up through the left hallway and make the "Left Hall to Platform" jump. Now, the defender is usually waiting for you to make such a move and will be standing there ready to push. What you do is use push before they do it (just before you jump or mid-air) and it will negate their push (and could kill them if they're in the wrong spot). Land, grab the flag, and if they're still alive a few well placed flechette balls will take them out and you can escape. Don't attempt to jump while on the platform because the defender will keep trying to push you to your death. If you have the force, pull their main weapon first and then finish them off. Again, it's always helpful to have a bunny energizing you before you enter the other team's base.
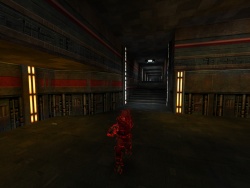 Rage + Speed
You wouldn't like me when I'm angry...
Rage can be a runner's best friend. The combination of rage and speed allows you run insanely fast, be impervious to damage (to an extent) and increases your rate of fire and firepower. Pretty useful when taking on a few defenders. The trick to using rage effectively is to use it once you're near or passed the middle of the map. Now this is important: Rage + Speed takes up ALL of your Force points... it leaves nothing for jumps or push/pulls. Unless you have a bunny around you'll be left very open to enemy pushes and pulls... you'll most likely go for a fall. And, if you use jump or another force power while speeding you won't have anything left for rage. So BE CAREFUL. This strategy won't always guarantee success, but it works for changing things up a bit.
Fortunately, you go so much faster with rage and speed that you can make the left hall/platform jumps with ease. This isn't useful when going into the base because a defender is usually there. But it makes for a quick escape if you can dispatch the defender then grab the flag.
Defender
The Defender is the person responsible for protecting their teams flag from enemy runners. A Defender's job is quite simple: Kill every member of the opposing team that enters the base as quickly as possible. And, should the flag be captured, attempt to chase down the runner and return the flag.
Position Overview
Weapons
As the Defender, it is important to familiarize yourself with the locations of all weapons, including the sentry turret, which can be extremely useful in aiding your defense of the base.
The first thing you should do upon spawning is pick up either of the two splash weapons - the Flechette Cannon or Repeater Rifle to cause the most damage to players trying to enter the base through the two main halls. Activate Force Seeing and track the movements of enemy players. If they come down the hall begin by shooting a few spray shots while they're at a distance and ,as the get closer, unleash a barrage of exploding rounds. If this does not kill them it will at least weaken them.
After grabbing one of the more powerful weapons and some ammo, pick up the sentry and set it up on the platform. Place the sentry on the edge of the platform, NOT at the entrance. This is extremely important for two reasons:
- So that a return Runner is not obstructed while trying to cap the flag
- If a member of the opposing team grabs the flag you can shoot the turret to blow them off the edge.
Force Push and Pull
As a Defender, Force Push/Pull will be extremely useful. Many Runners make use of the hall jumps. This is when a runner is most vulnerable. Make sure you always have a bit of force stored up for when a runner decides to jump, it is a great way to save time and ammo.
Expect to Die... A Lot
If your Force or Health is low, don't be afraid to hit that binded 'Kill' key. A defender in top shape is better then one with only three hp left and no force. Having said this, make sure that there are no enemies in the base when you do this, otherwise you're leaving your flag wide open. Also, sometimes you'll be overwhelmed by the other teams forces. Fortunately, you'll always spawn back in your own base. You'll be able to return to the fight quickly by grabbing a weapon and taking out the runners before they escape with the flag.
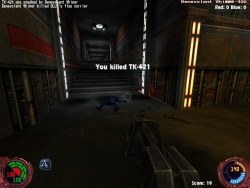 Recovering the flag
Flag Recovery
If the opposing team has your flag the defender has only one course of action: Seek and destroy. Force Speed your way to the enemies base and locate the flag carrier, then unleash hell. Fire as many exploding rounds as possible until their runner is dead. If it doesn't work the first time keep doing it. Your runner is depending on your swift actions in returning the flag.
If you can prevent the opposing runner from even reaching his/her base, that is even better. Use Force Push/Pull in the center chamber can once again save ammo and time.
Force Sight Sees All
For a Defender Force Sight is a must have power to be activated at all times. It gives you warning on when enemies are coming and it allows you to see when your runner is returning so you can prepare accordingly. If you're not using seeing and you're a Defender stop sucking and start seeing!
Strategy
I feel like a pervert?
To battle the rage + speed combination when there are competant bunnies around, the crafty defender will try out new strategies to use. One of these is using Light Side force powers and utilizing the power of Persuasion. Most times if a rage/speed runner can see a defender on or near the platform they're not going to attempt any jumps. But, if they can't see you they're more likely to risk a jump only to discover, much too late, that you're hiding. It'll give them something to think about on the way down.
I'm a pushin' and a pullin'
When defending against jump users, it's always best to stay to close to the entrance of the flag platform. This way you're prepared to push any of those speedy jumpers and it gives you a chance to see who's coming from farther away. A good defender will always keep himself topped up with ammo and force... this usually means that he has to self-kill a lot for ammo and health replenishment. It's better to not take too many shields just in case your runner needs them when he returns.
Sudden Death
When a runner has grabbed your flag and has made it past the center of the map you're left with few options. Now they've managed to load up on ammo, shields and health... AND they'll most likely have a teammate guarding their ass. Your best option is to go all out kamakazi style on them. Grab a repeater or flechette, hit up the rage/speed combo and gun that bitch down. The beauty of it is you can die over and over and keep returning to that runner's base before he can re-shield. This is also a great way to end a stalemate when both teams have the other's flag.
Support
The position of support is one of the easiest positions to pick up, but it is quite hard to master. Basically, your job is to assist your team in any way possible. This can mean assisting the defenders if the opposing team attempts to rush your base, or helping the flag runner safely escape from the opposing base.
Position Overview
Use the Map to Your Advantage
To be a successful support player, you should take the time to learn the layout of the map, paying special attention to any base entrances and chokepoints. The chokepoints are especially useful, as you will be spending a lot of time attempting to maintain control of them. By controlling the chokepoint, you allow your runner to get that much closer to the enemy flag before encountering resistance. As a secondary benefit, the opposing team is more likely to spend time attacking you and less time doing something more useful. Know where the closest ammo/weapon spawns to the chokepoint are, and take note of any alcoves or hiding spots.
Teammates Status and Location
Remember to take very seriously your role as “Support”. If one of your teammates calls for a Team Energize/Heal, be ready to hit that button. One of the best tools to help you with this is the team status overlay. At a glance, you can see which teammate is currently under attack, and may need assistance. For example, if you see the defender(s) taking damage, you may want to try and get behind the enemy and shoot at their backs (while they’re shooting at your team).
Give Yourself to the Cause
Repeat after me: “I am expendable. I will give my all for the flag”. As a support player, death is of little importance to you. By killing you, the enemy has used up ammo that could be used against either the defense or the runner. They have taken time from their positions simply to chase you down. You, on the other hand, can return to your chokepoint with minimal equipment and continue harassing the opposing team. To that end, do whatever is necessary to either annoy the other team, or help your own. See that group of enemies chasing your runner? Jump in between them and your runner and play human shield. Similarly, if your runner is going in one entrance to the opposing base, go ahead and make a complete idiot of yourself in the other entrance. Get the whole team playing “stomp the annoying idiot”. Every opponent shooting at you isn’t shooting at your runner. Remember your place when going for health and shields. It’s your job to die; don’t take them unless everybody else is at full health.
Strategy
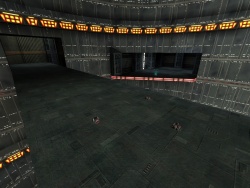 Det packs on upper bridge
Eat my detpacks... bitch
When supporting/guarding the center of Bespin, make it a habit to lay detpacks in the middle of the lower and upper bridge. If a flag runner is trying to cap they have to run through this way. Jumping is dangerous with the pushing and pulling, so most attempt to blindly scurry across one of the bridges. A hidden detpack will launch that runner over the edge with minimal effort on your part.
I See You
When guarding the center, if you see that your flag has been grabbed face your base and turn on Force Seeing. This will allow you to figure out which way the runner is coming and you can plan your defense accordingly. If the runner is alone and coming from the left hallway you can prepare to push/pull them to their death and set up a detpack on the lower bridge. If he/she has a partner prepare to use a weapon to take care of them. If the runner attempts the large window jump from the right all you need is a well placed push/pull to finish them off. If you see the runner is coming from the right side, meet them in the confines of the hallway. You'll slow them down and be able to cause a lot of damage. Plus, as long as they don't get energized, you'll be able to catch up to them if you're killed first. And you'll still have a chance to push/pull them off the bridge.
Maps
Bespin Exhaust Shafts
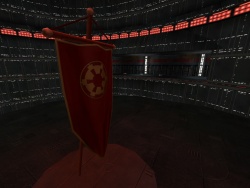 Red Flag Platform
- Bespin is the standard CTF map used because it’s well-suited for matches of both 3v3 and 4v4. If you have more players try using a larger map. If you have less, try to get more people to play. CTF is no fun with four players.
- Bespin is split into three parts. Base red, center, and base blue. At the exact center the map mirrors itself, so learn one half and you’ve learned the whole. The flag is located in a circular chamber on a platform surrounded on all sides by a death drop. To the left is a small window that leads to the left hallway. To the right you can see the right hallway. A door is open to a hallway running behind the base, which adjoins to a room with a bacta canister and three small shields.
- Going left leads you across a sentry-gun and a Flechette, as well as three small shields hidden behind a wall. This path will lead you to the center, but splits to either a small sniper post, or directly on the main bridge of the map.
- Going right leads you to a Repeater, as well as three health packs. This hall leads directly into the center and to a bunch of ammo and small shields lined up against a wall.
Tips and Techniques
Avoiding Pushes and Pulls
Push/Pull whores are rampant in the Bespin map. Your best defense is to try to avoid the pitfalls and stay grounded – that is, try not to jump around unless absolutely necessary. When running and using the platform jumps there are ways to somewhat defend yourself from an enemy defender standing on the platform itself. If you’re facing such a problem, they are more than likely going to use push and/or pull to blast you off course and into the abyss. Try using a pre-emptive force push at them just after you jump. Most times this will negate their use of push/pull and give you the couple of seconds you need to safely land, grab the flag and hopefully kill the enemy before deciding which way to run. It should be noted that this technique only works if the enemy in question is in your push radius. People behind you will be unaffected and able to pull you off course. Fortunately, this technique isn’t limited to just the platform jumps. Any time an enemy is blocking your path at a jump point you can attempt to use it and get around them. Practice it and you’ll find your chances of succeeding greatly increased.
Utilizing Bound Commands
Bound commands are any special function you’ve bound to a particular key to speed up a menial task. For instance taking a screenshot. Using the command: bind [button] screenshot you can take all the screens you want just by hitting the bound button. To bind commands to buttons you have to first bring up the "console". Simply do this by hitting the shift and tilde keys. The tilde key is the ~/` key just underneath "Esc".
It’s good to use binds for doing things in CTF as well. Binding text is the best strategy as you can relay information to your team just by clicking a button. It helps speed up your falling deaths to bind the command ‘kill’ to a button. Just tap it when you’re falling and you’ll die instantly and be able to spawn faster.
Other useful binds include warning your teammates of incoming attacks, or letting them know you have the flag and need help, or if you need to be energized. Those last two are especially important for flag runners. The command to bind team text is as follows:
- Bind [KEY] say_team [TEXT]
Suggestions:
- Bind [KEY] say_team Energize
- Bind [KEY] say_team Help me!
- Bind [KEY] kill
Common Tips
- Try to conserve your force pool as much as possible. You never know when a well-placed push or a burst of speed will be needed to stop a flag runner.
- Speed yourself up by strafe jumping through flat hallways where you cannot be pushed or pulled.
- Before charging heedlessly into the enemy’s base, try to cross paths with a flechette or repeater and any shields you can find.
- Avoid placing sentries right at the entrance to your flag platform. Most times it can screw up your returning runner and if destroyed will blow him off the platform.
- When running through the center of the map attempt to use Team Energize to give your teammates an always-needed boost of force power.
- Use the bound command “kill” when falling to your death to speed up your respawn time.
- Dying with any non-Bryar weapon out drops the weapon with one full clip of ammo. Combine this with /kill to pass ammo to a teammate.
- Turn on your Team Overlay via the console to see stats on your fellow teammates including their health, shield and weapon. Simply type cg_drawTeamOverlay 1 into the console and hit enter.
CTF Force Configurations
Runner/Defender
(Dark Force Powers)
| Power |
Level
|
| Force Jump |
3
|
| Force Push |
3
|
| Force Pull |
3
|
| Force Speed |
3
|
| Force Seeing |
3
|
| Force Grip/Drain |
3
|
| Force Rage |
3
|
| Team Energize |
3
|
| Saber Attack |
1
|
| Saber Defend |
2
|
Support
(Dark Force Powers)
| Power |
Level
|
| Force Jump |
3
|
| Force Push |
3
|
| Force Pull |
3
|
| Force Speed |
3
|
| Force Seeing |
3
|
| Force Drain |
3
|
| Team Energize |
3
|
| Saber Attack |
1
|
| Saber Defend |
3
|
Standard JO CTF Configurations
Configuration A
(6-Button Mouse)
| Function |
Button
|
| Forwards |
W
|
| Backwards |
S
|
| Strafe Left |
A
|
| Strafe Right |
D
|
| Primary Fire |
Mouse Button 1
|
| Secondary Fire |
F
|
| Jump |
Mouse Button 2
|
| Force Push |
E
|
| Force Pull |
R
|
| Force Speed |
G
|
| Force Seeing |
Z
|
| Force Rage |
Q
|
| Force Grip |
T
|
| Team Energize |
V
|
| Lightsaber |
1
|
| Bryar |
2
|
| Flechette |
Mouse Button 5
|
| Repeater |
Mouse Button 4
|
| Kill |
X
|
Configuration B
(6-Button Mouse)
| Function |
Button
|
| Forwards |
W
|
| Backwards |
S
|
| Strafe Left |
A
|
| Strafe Right |
D
|
| Primary Fire |
Mouse Button 1
|
| Secondary Fire |
Mouse Button 2
|
| Jump |
Shift
|
| Force Push |
Mouse Button 4
|
| Force Pull |
Mouse Button 5
|
| Force Speed |
3
|
| Force Seeing |
R
|
| Force Drain |
E
|
| Team Energize |
X
|
| Lightsaber |
1
|
| Bryar |
2
|
| Kill |
Backspace
|
Kir's Configuration
(3-Button Mouse)
| Function |
Button
|
| Forwards |
W
|
| Backwards |
S
|
| Strafe Left |
A
|
| Strafe Right |
D
|
| Primary Fire |
Mouse Button 1
|
| Secondary Fire |
Mouse Button 2
|
| Jump |
Spacebar
|
| Force Push |
E
|
| Force Pull |
F
|
| Force Speed |
R
|
| Force Seeing |
X
|
| Force Rage |
T
|
| Team Energize |
Q
|
| Lightsaber |
1
|
| Bryar |
2
|
| Kill |
B
|
Authors
Shadow Taldrya
Benevolent Taldrya Whiner
Fire-Knight
Chaosrain Taldrya
Syn Kaek
Kir Taldrya Katarn
NexusMage
Assorted members of Clan Taldryan